Codux Help Center
Browse our articles to find the answers you need
Managing Pages in Your App
In the context of Codux, pages are the building blocks that shape both how your app looks and how users move through it. Each page represents a unique screen or view that users can visit, like your home page, about page, or product details page. These pages map to specific URL paths (Remix routes) and can include parameters — dynamic placeholders that adapt to show different content (imagine a single product page design that automatically updates to show different products based on what users click).
Beyond just displaying content, pages in Codux can fetch data before rendering, handle errors gracefully, and maintain a consistent navigation experience for your users.
If you started your project using one of our templates, you're ready to work with pages in Codux. Otherwise, refer here for information on defining your Remix app so that Codux can manage its pages effectively.
Important!
At the moment, page functionality in Codux is only relevant to Remix projects.
Navigating Between Pages
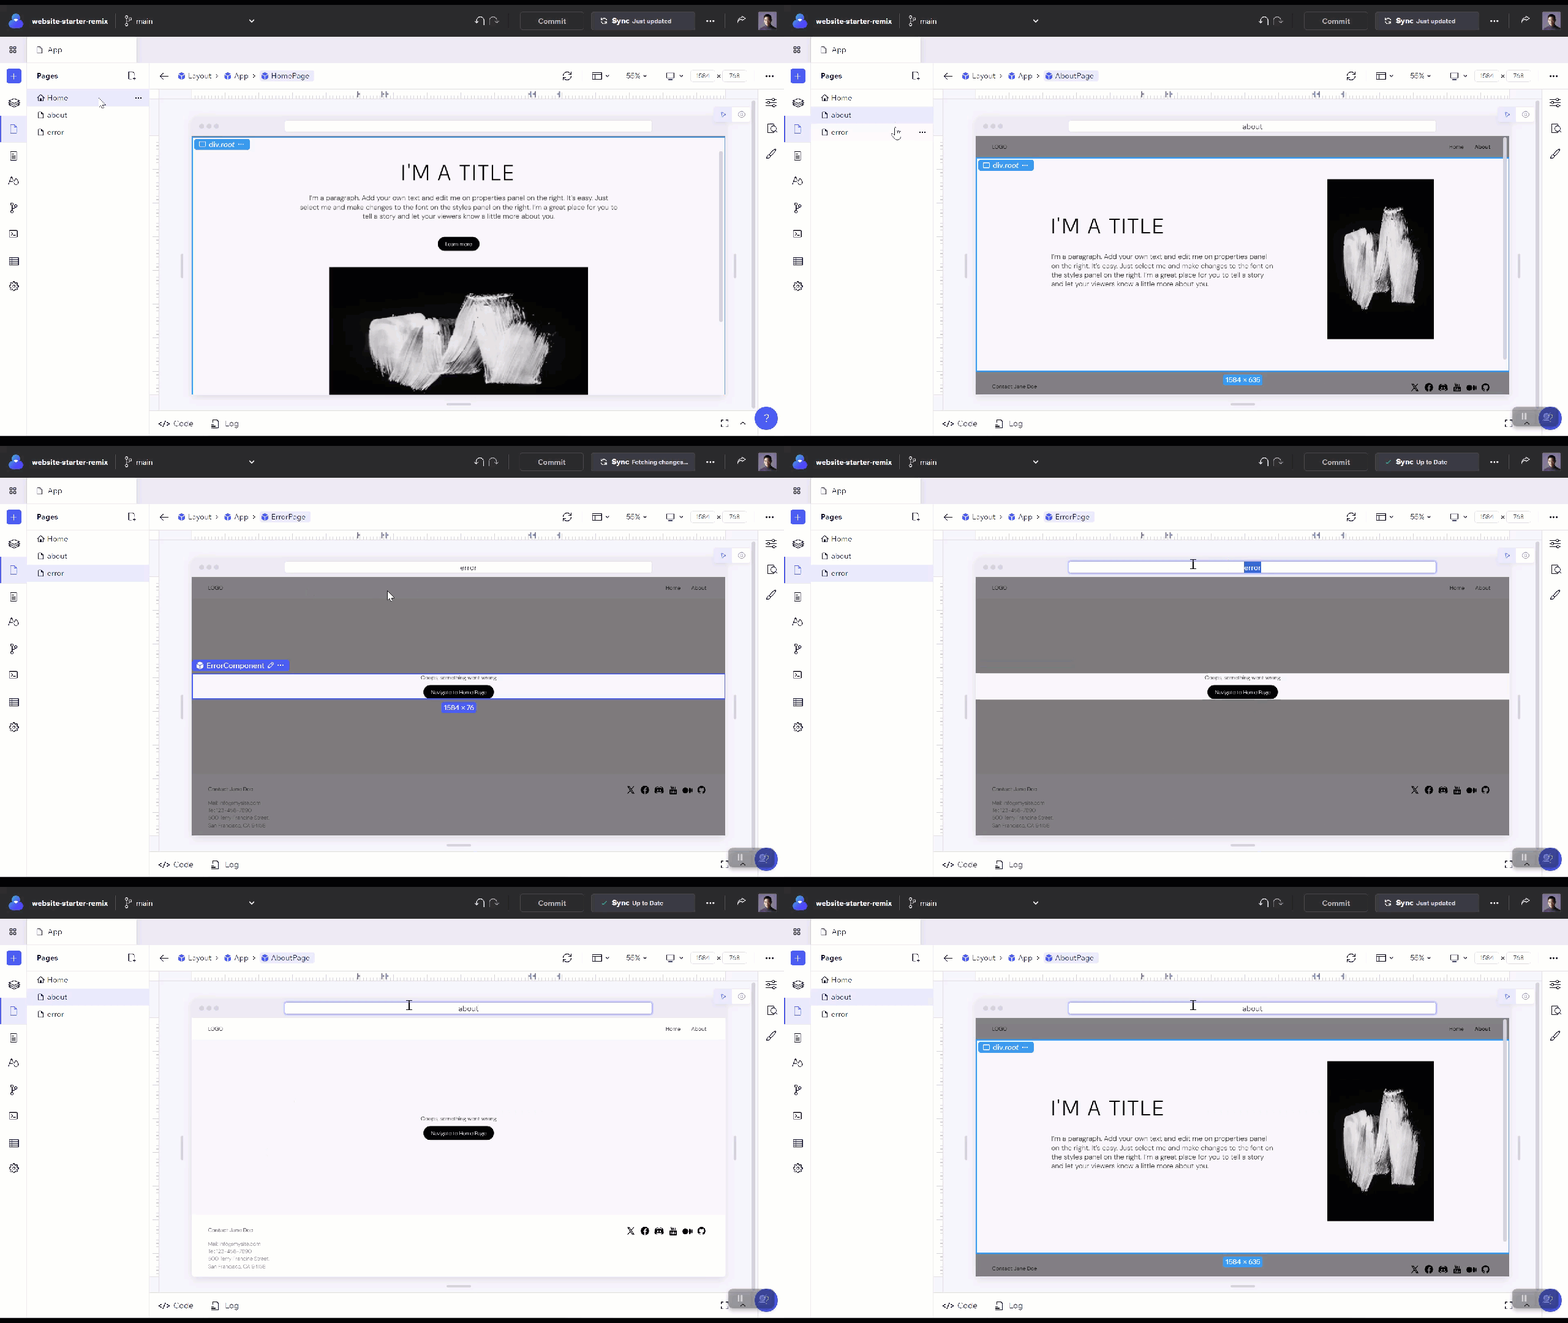
Codux makes navigating your app's pages easy. If you're starting from one of our Remix templates, your pages will already be detected. Just click on a page in the Pages panel to view and edit it, or navigate to a page through the navigation bar on the stage, or while interacting with your app while in Preview mode.
Note: Codux uses the same file structure system as Remix projects. Routes can be created using folders in the
app/routes directory, where the folder name determines the route's URL path, and a route.tsx file inside the folder defines the route's content. The folder may contain other files as well, such as style files.├── routes/
│ ├── _index/
│ │ └── route.tsx
│ ├── about-us/
│ │ ├── route.module.scss
│ │ └── route.tsx
│ └── thank-you/
│ ├── route.module.scss
│ └── route.tsx
When Codux creates and edits pages, it modifies the project files and folders, makes changes directly to this path, and warns you as such when applicable.
Create a New Page
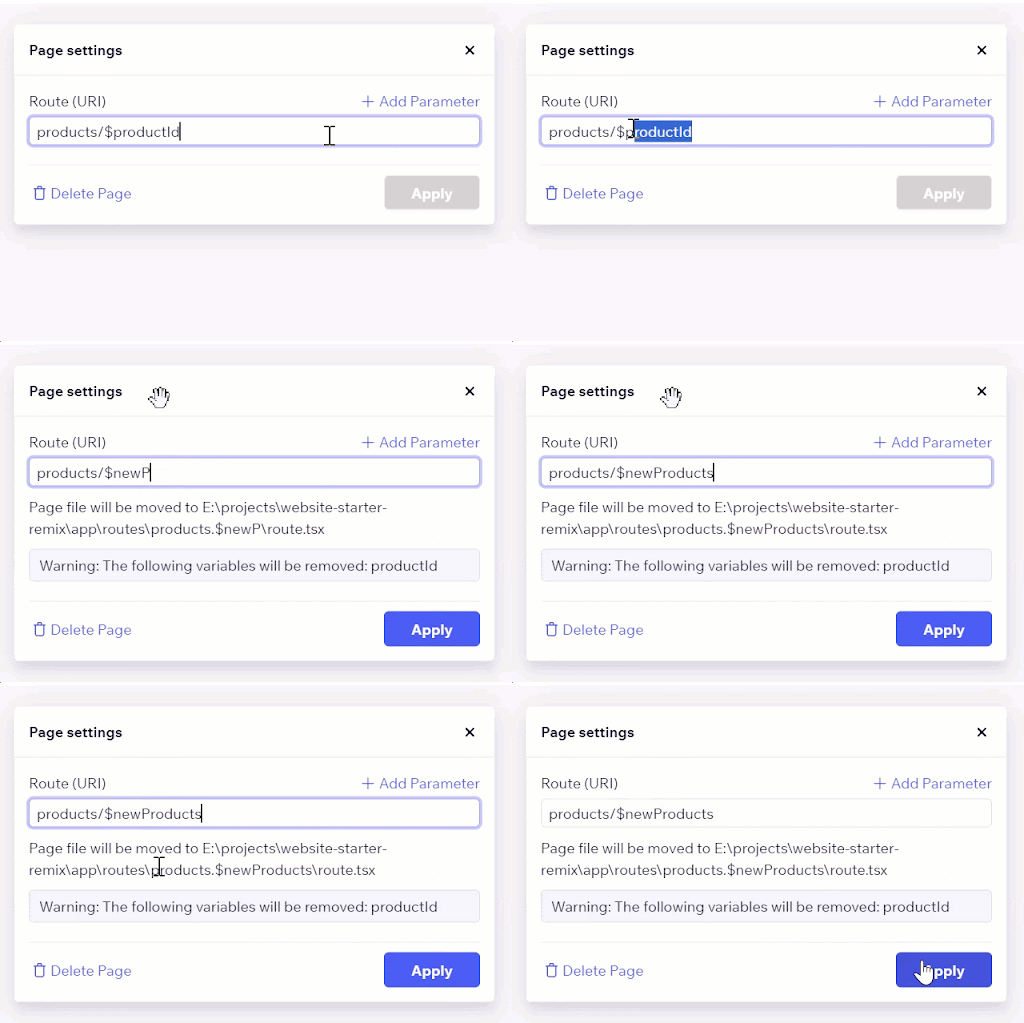
To create a new page in your app, navigate to the Pages tab, and click Create New Page.
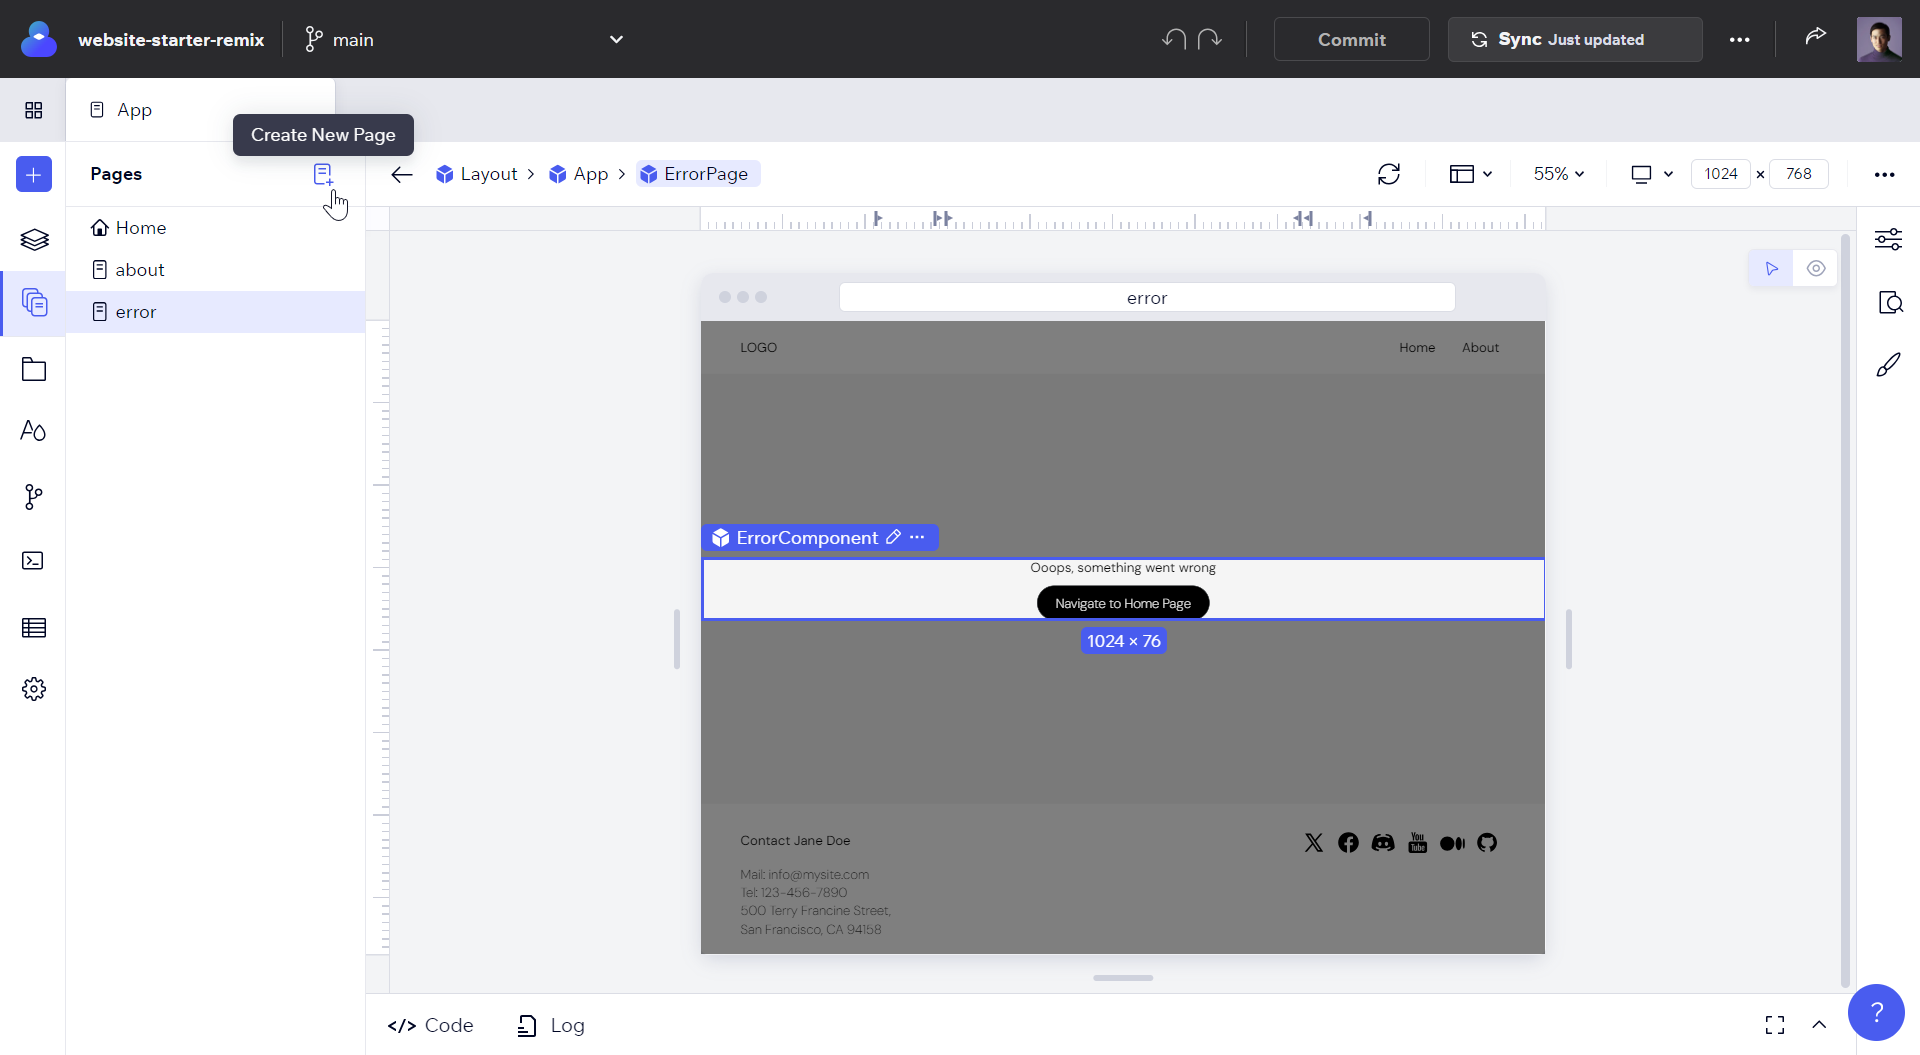
Enter the route for the new page to determine the URL where the page can be accessed. You can create a subpage by adding a slash. For example:
- /about
- /products/electronics
When you create a new page, Codux will add a file and folder for that page in the
routes directory.Note:
The homepage of your app is handled differently. It's represented by the root's
index/route.tsx file. This file has no specific route settings, as it represents the root URL ("/"). If you remove this file, you'll need to manually create it to define your homepage content. For more details on how Remix handles index routes, refer to the Remix documentation on index routes.Dynamic Pages
Dynamic pages are special pages that show different content while keeping the same design. Think of them like a template - just as your favorite e-commerce site uses the same layout for every product page but shows different products, dynamic pages use parameters in their URLs to display different content. For example, instead of creating hundreds of individual product pages, you'd create one dynamic page with a route like
/products/$productId that adapts to show any product.To create a dynamic page, click Add Parameter in the Create New Page or Page Settings dialog. Codux will add a placeholder
/$param to your route which your development team can then customize with the necessary code to make it functional (adding a <Loader> function, defining what content to show based on the parameters, fetch the right data from your backend, handling cases where the requested content doesn't exist, and so on).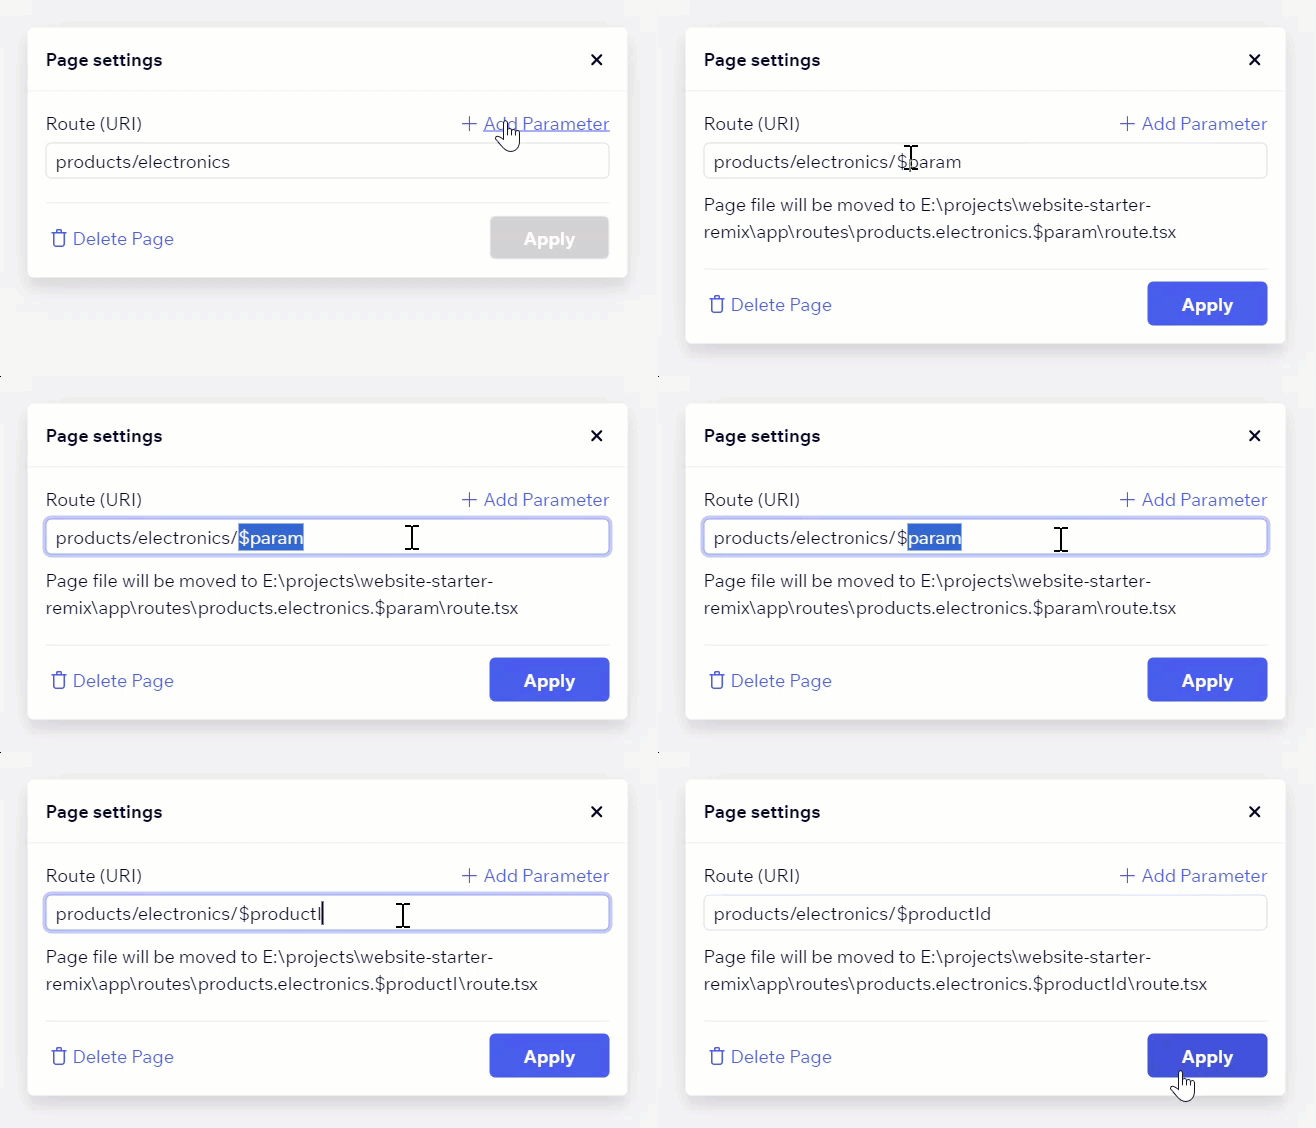
Viewing Dynamic Pages
To view a dynamic page in your app, switch to Preview mode and navigate to it through your app's UI. You can also view a dynamic page by navigating to it from the dynamic page list in the Pages tab as shown here:
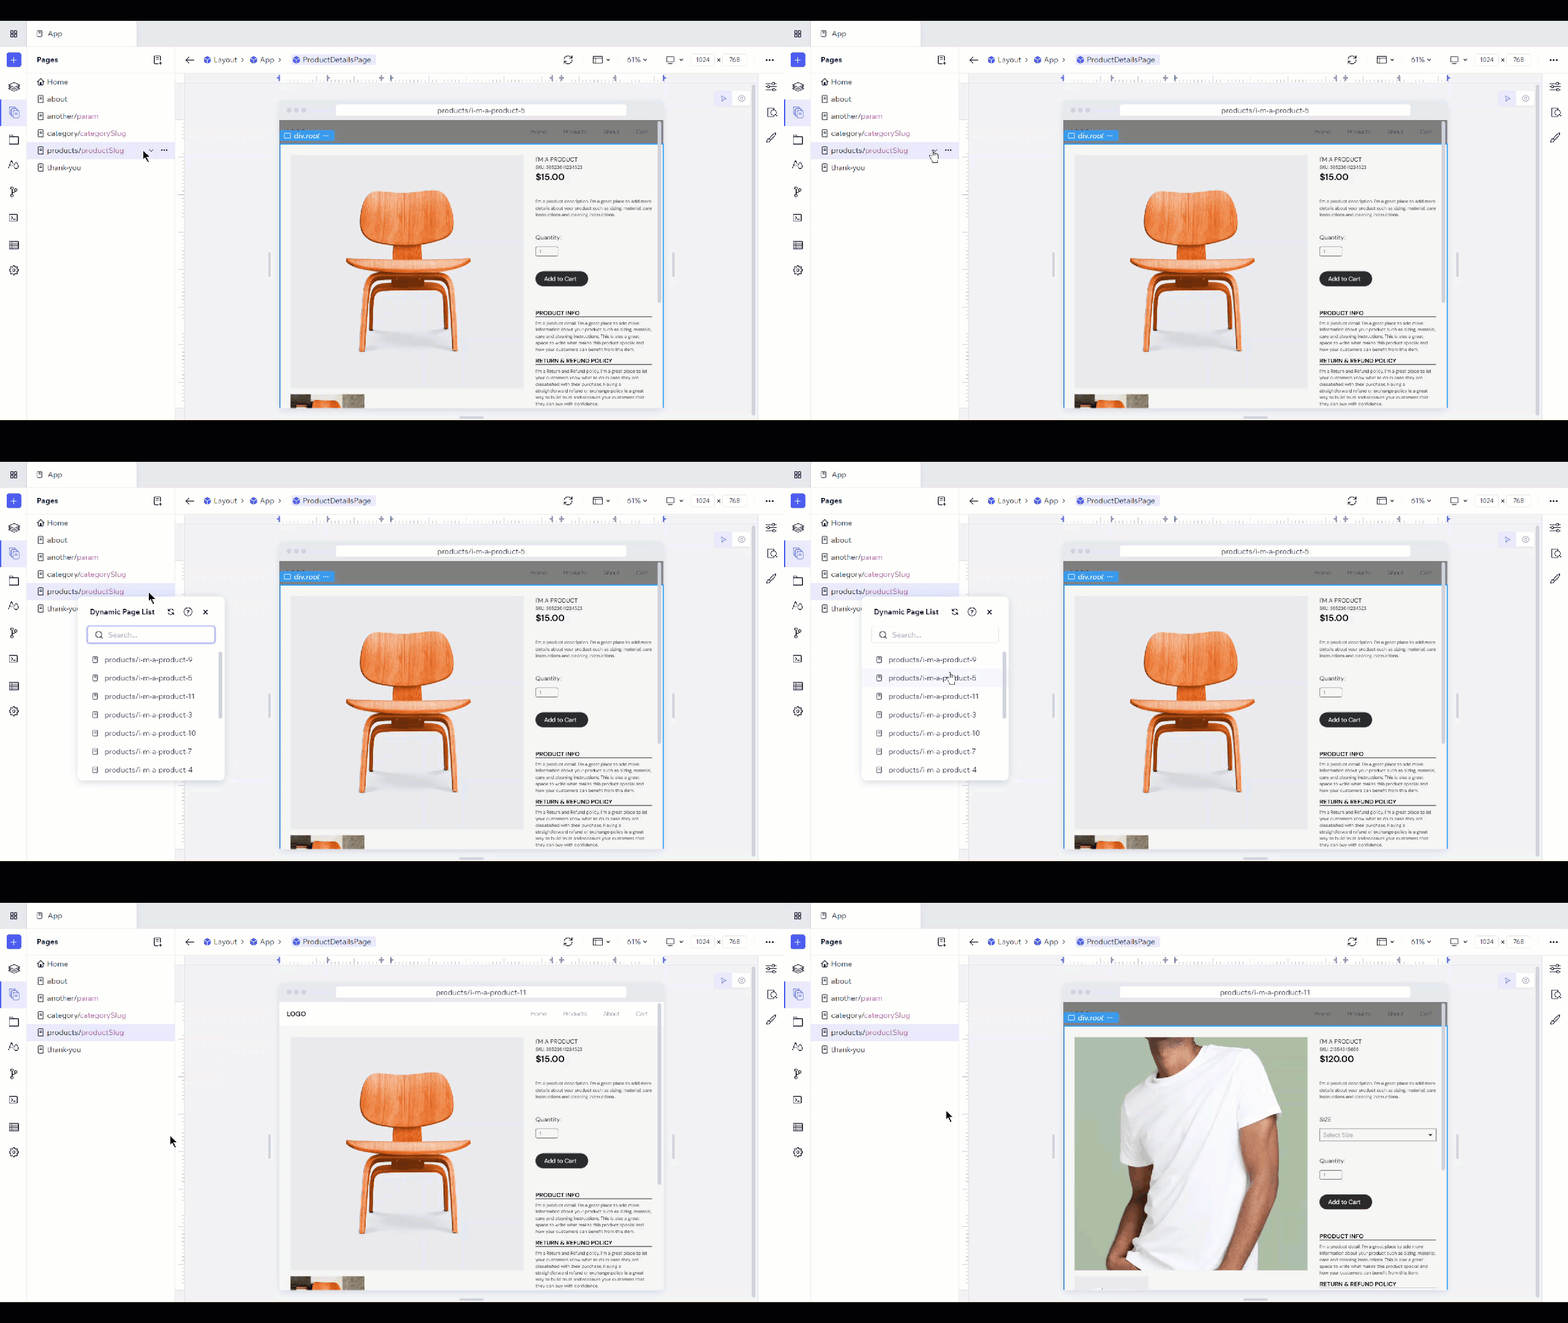
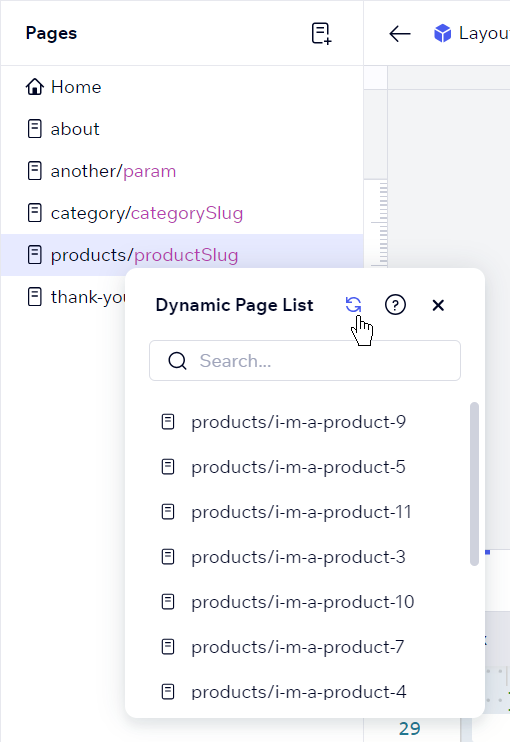
From here, search for and select a dynamic page to navigate to it, or click the refresh button to refresh the list (see Defining Dynamic Pages below).
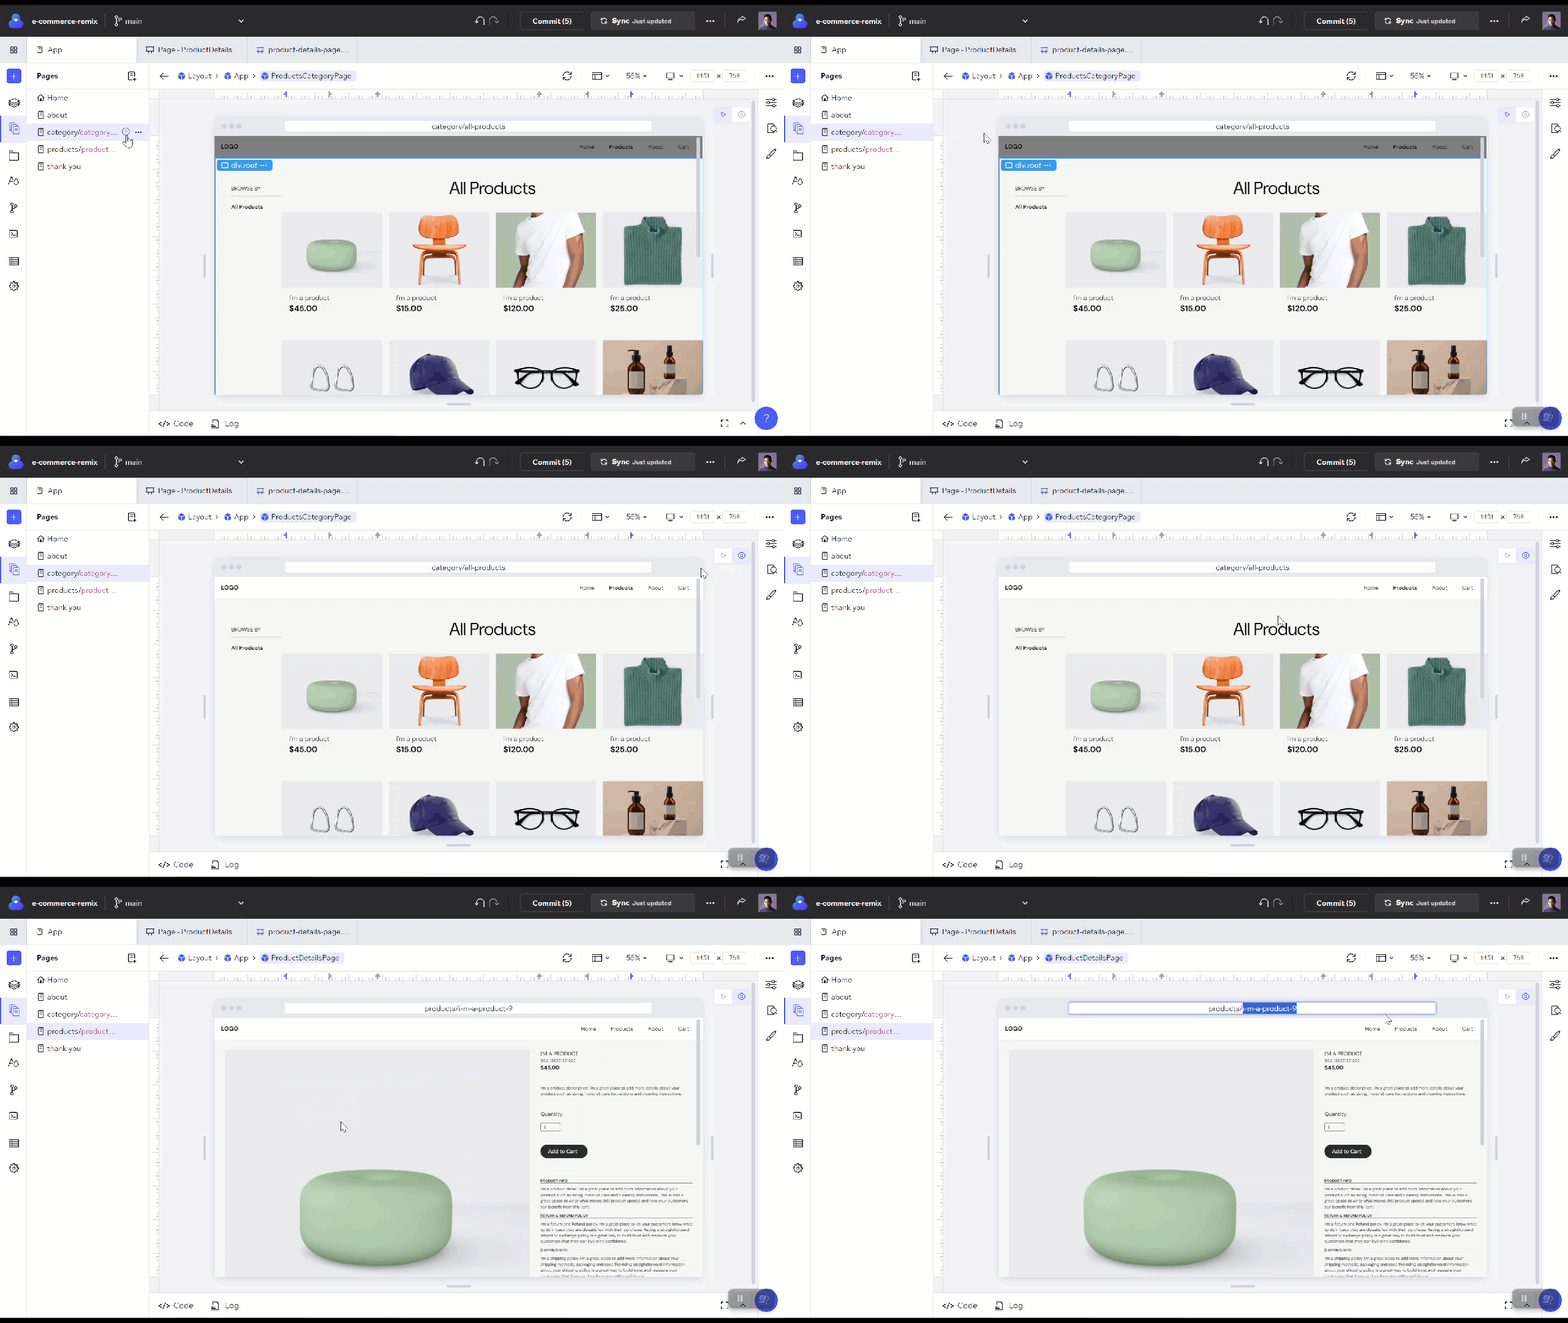
You can also enter the specific dynamic route (including the necessary parameter, like a product ID) directly in the navigation bar on the stage. For example, if you have a dynamic product page with the route /products/$productId, you might enter /products/123 in the navigation bar to view the page for a product with this ID.
Defining Dynamic Pages
For Codux to know of all the possible dynamic routes for a particular page, use the
getStaticRoutes function in your dynamic route file.Let's take a look at this example:
1 2 3 4 5 6 7// route.tsx export const getStaticRoutes = async () => { const products = await getEcomApi().getAllProducts(); if (products.status === 'failure') { return []; } return products.body.map((product) => `/products/${product.slug}`);};
This asynchronous function fetches all the store products from the Wix Headless backoffice, and returns an array of strings, where each string is a complete URL path for a product page.
Editing a Page Path
To change a page, access its settings from the Page Settings icon.
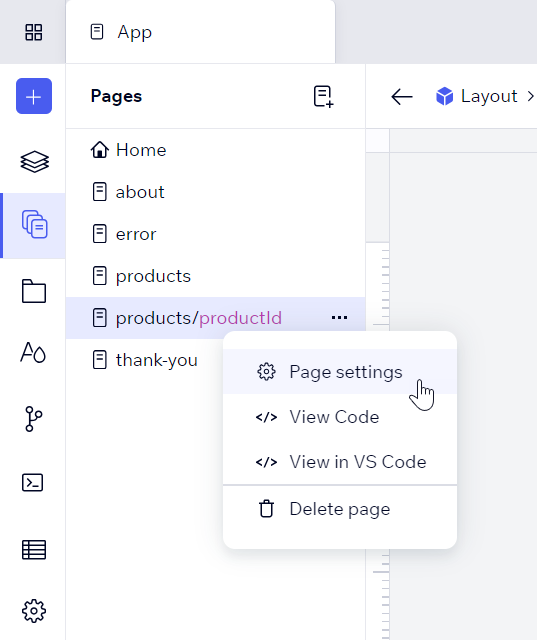
Here you can modify a route, view its code, view in VS Code, and delete a page.
Was this article helpful?