Codux Help Center
Browse our articles to find the answers you need
Customizing the Path for New Components and Component Templates
Codux needs to know where you'd like to save the components you create and their related files. If you started the project from one of the templates we offer in Codux, a path is already set for you. If not, you'll need to set it.
The configuration key
newComponent also contains a property for setting a path to component templates.newComponent
- Description: Configuration for new components.
- Type: Object {}
- Properties:
componentsPath(string, required),templatesPath(string, optional)
How to add to codux.config.json
Property: componentsPath (string, required)
The
componentsPath property specifies that path where new component files are saved to. Here's how it's used:1 2 3 4 5 6{ "$schema": "https://wixplosives.github.io/codux-config-schema/codux.config.schema.json", "newComponent": { "componentsPath": "src/components" } }
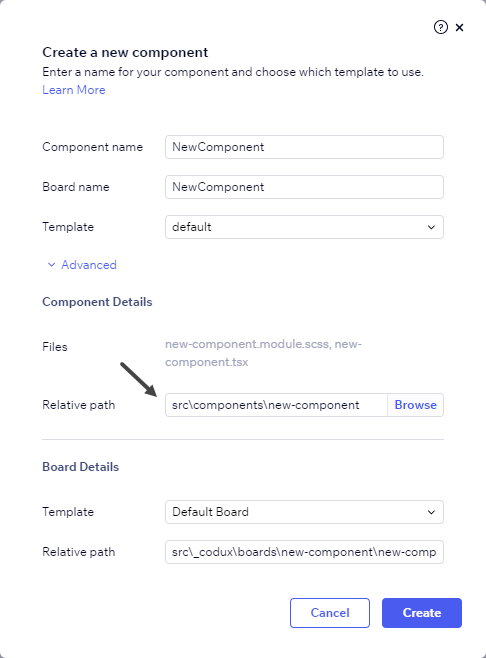
When a user creates a new component, they'll see the suggested path for the component in a subdirectory of the path configured here.

For information on creating board templates to use for new components, see here.
Property: templatesPath (string, optional)
Out of the box, Codux comes with a simple built-in template for new components. When users create a new component, they get a simple text div to start them off. To give them a jump start, you can create a custom template with more relevant elements, style sheets, and other related files for them to base their new components off of. Codux will generate new component files using the template's code, and copy the relevant files over to the new component.
The
templatesPath property specifies that relative path to the component templates folder where available templates are stored. Here's how it's used:1 2 3 4 5 6 7{ "$schema": "https://wixplosives.github.io/codux-config-schema/codux.config.schema.json", "newComponent": { "componentsPath": "src/components", "templatesPath": "src/component-templates" } }
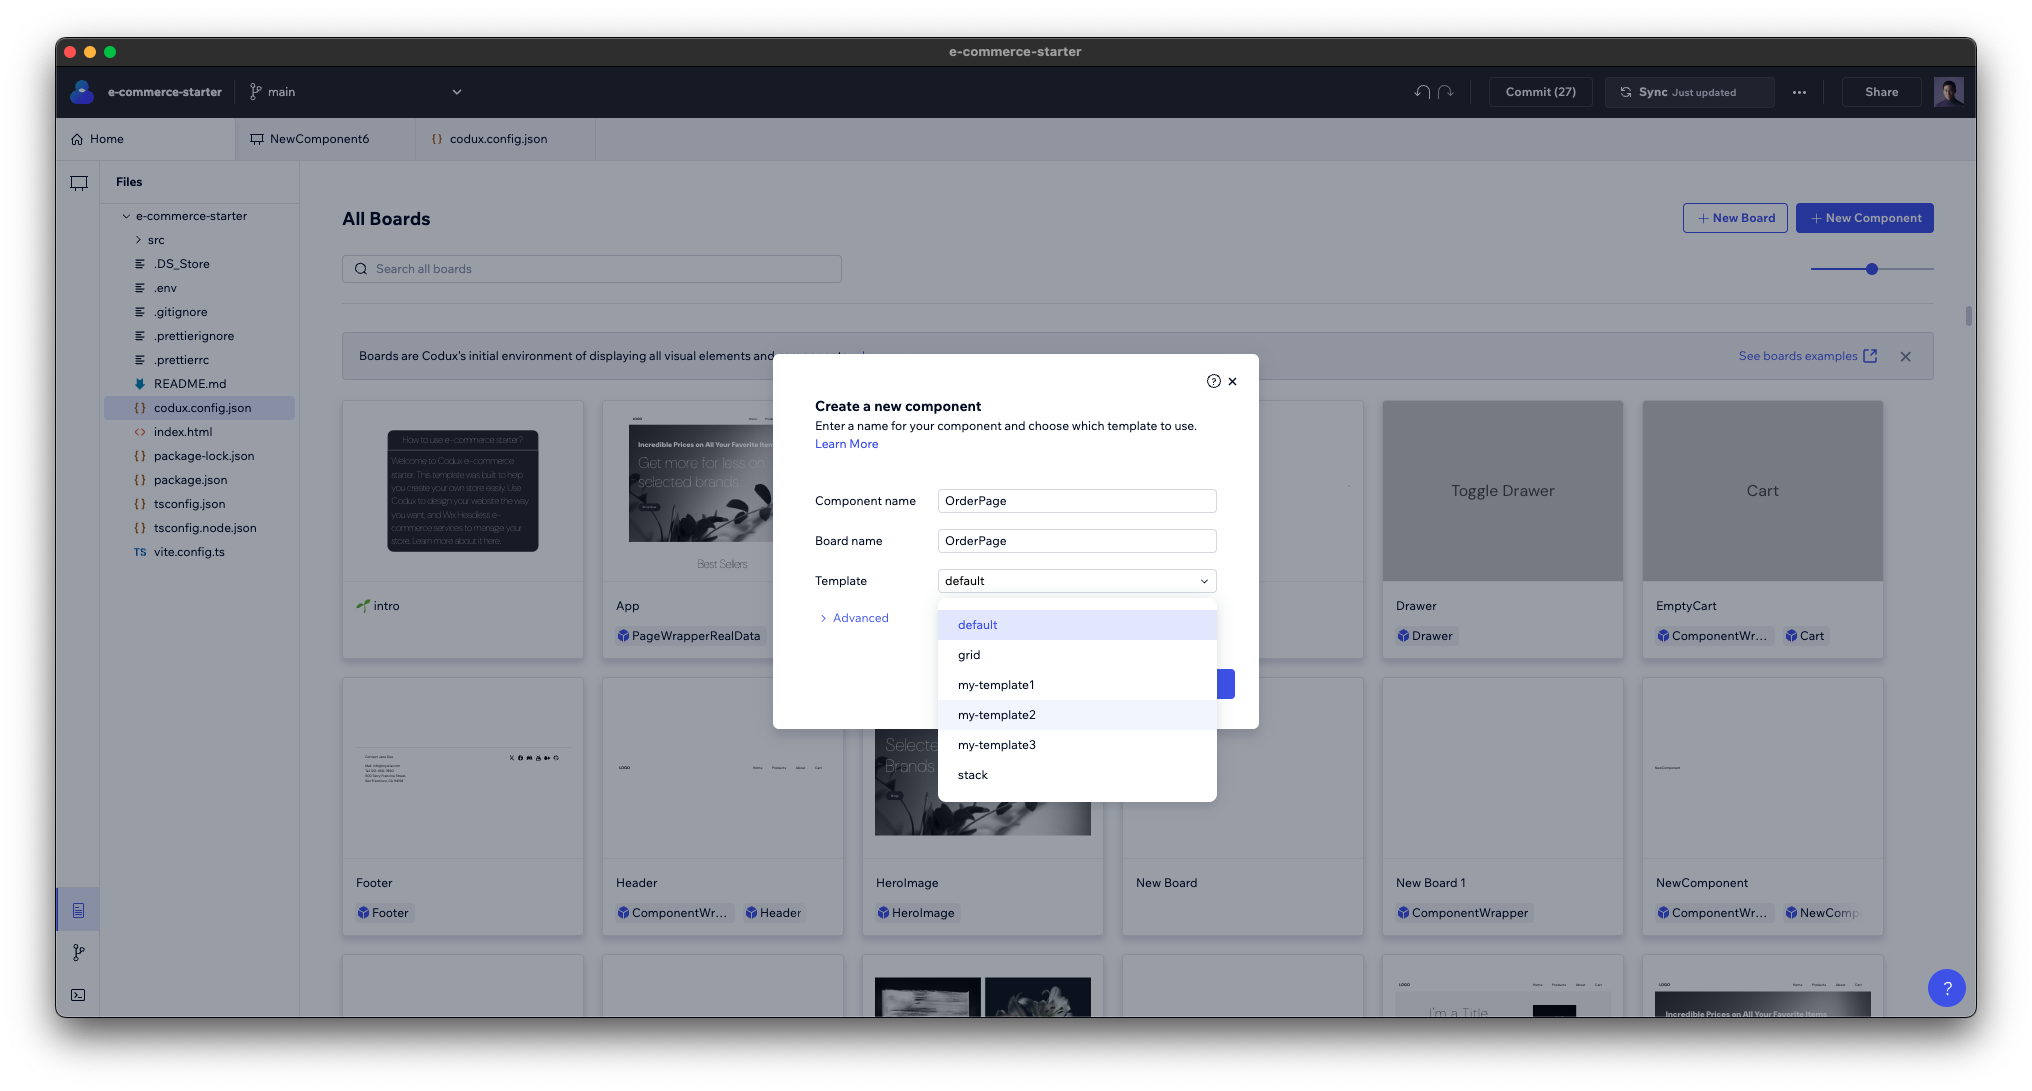
Templates in this path will show up in the new component dialog for users to create their new components from.

Creating Templates
A component template can consist of either a single file or multiple files. For single-file templates, you can store them directly in the templates path. If your template has multiple files, organize them within a subdirectory. With multi-file templates, follow one of these three naming conventions for the template file:
new-board.board.tsx(kebab-case)NewBoard.board.tsx(pascal-case)newComponent.board.tsx(camel-case)
The template name that shows in Codux will be based on either the folder name (for multi-file templates) or the single-file template file name.
Here's an example of a project directory structure with three component templates:
├── src
│ ├── components
│ ├── component-templates
│ │ ├── toggle-control
│ │ │ ├── new-component.css
│ │ │ ├── new-component.tsx
│ │ ├── button.tsx
│ │ ├── other-template
│ │ │ ├── new-component.tsx
In this structure:
srcis the root directory where source files are located.componentsis a directory that would typically contain individual component files.component-templatesis a directory that contains subdirectories for different types of component templates.toggle-controlis a template directory with its own CSS and TypeScript files.buttonis a single-file template.other-templateis a third template directory, also with a TypeScript file.
Using Templates
The video below shows what happens when a component (
ToggleSwitch) is created from the toggle-control template. When the new component renders on the stage, you can see that it already contains the code copied from the template.Behind the scenes, Codux takes the code from the component template file and saves it to the new component file. Here's what the template component file used in the making of this video contains:
1 2 3 4 5 6// new-component.tsx import React from 'react'; import './new-component.css'; export const NewComponent = () => ( <div className="newComponent">I am a NewComponent made from a template</div> );
Notice how references to the component's name in the new component file created in the video match the name of the new component? Codux replaces these automatically.
1 2 3 4 5// toggle-switch.tsx import React from 'react'; import './toggle-switch.css'; export const ToggleSwitch = () => ( <div className="toggleSwitch">I am a ToggleSwitch made from a template</div>);
Property: templatesConfig (string, optional)
The
templatesConfig property allows you to specify different paths for the component files generated from each template. This is particularly useful when you have multiple templates that serve different purposes, such as documentation, components with data, empty components, pages with fake data, and pages with real data. By setting a unique path for each template type, you can organize your project's structure more effectively.In this example, the
"5-documentation" template's files will be saved in the "src/components/documentation" directory, the "1-component-with-data" and "4-component-empty" templates' files will be saved in the "src/components/components" directory, etc.1 2 3 4 5 6 7 8 9 10 11 12 13 14 15 16{ "$schema": "https://wixplosives.github.io/codux-config-schema/codux.config.schema.json", "newBoard": { "templatesPath": "src/board-templates", "templatesConfig": { "documentation": { "path": "src/boards/documentation" }, "board-with-data": { "path": "src/boards/with-data" }, "page": { "path": "src/boards/pages/" } } }}
This configuration ensures that when a user creates a new component using a template, the generated files are stored in the appropriate location within the project's directory structure, maintaining a clean and organized workspace.
Was this article helpful?